
I’ve used a few different tools for pinterest, but none of them can hold a candle to Tailwind.
1.Creating Your Posting Schedule
Let’s assume that you’ve finally signed up for Tailwind (it’s about time!) using my free month offer (yup, sign up through my link and get a free month of posting). Where do you go from here? Well first you need to creating your posting schedule.
[one-half-first]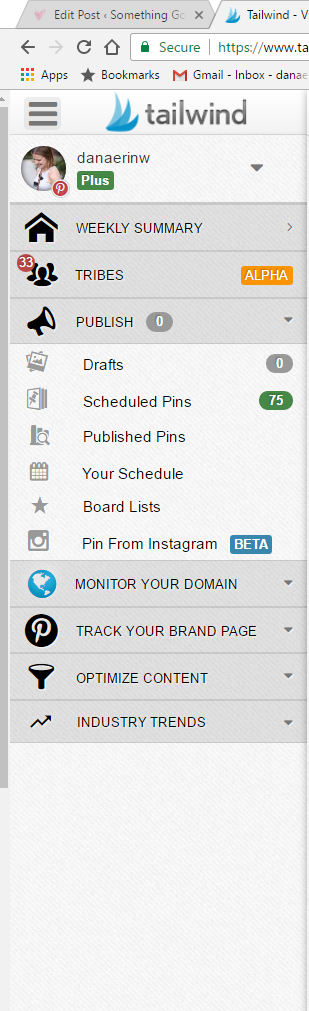 [/one-half-first]
[one-half]
First, go to the left hand panel. It’ll show up as a thin side bar ribbon, but it’ll expand once you hover over it. You then want to click on “Your Schedule.”
[/one-half]
Now, Tailwind is pretty nifty because right off of the bat it’ll suggest a number of posting times for you. Just start clicking on the light green buttons and you’ll start adding posting times.
In case you’re confused by all of the colors and outlines, here’s how it breaks down:
If you want to add even more time slots, just click the blue “+Add Timeslot” button.

2. Schedule Some Pins!
Okay, now that you’ve got your schedule set up, it’s time to start scheduling pins!
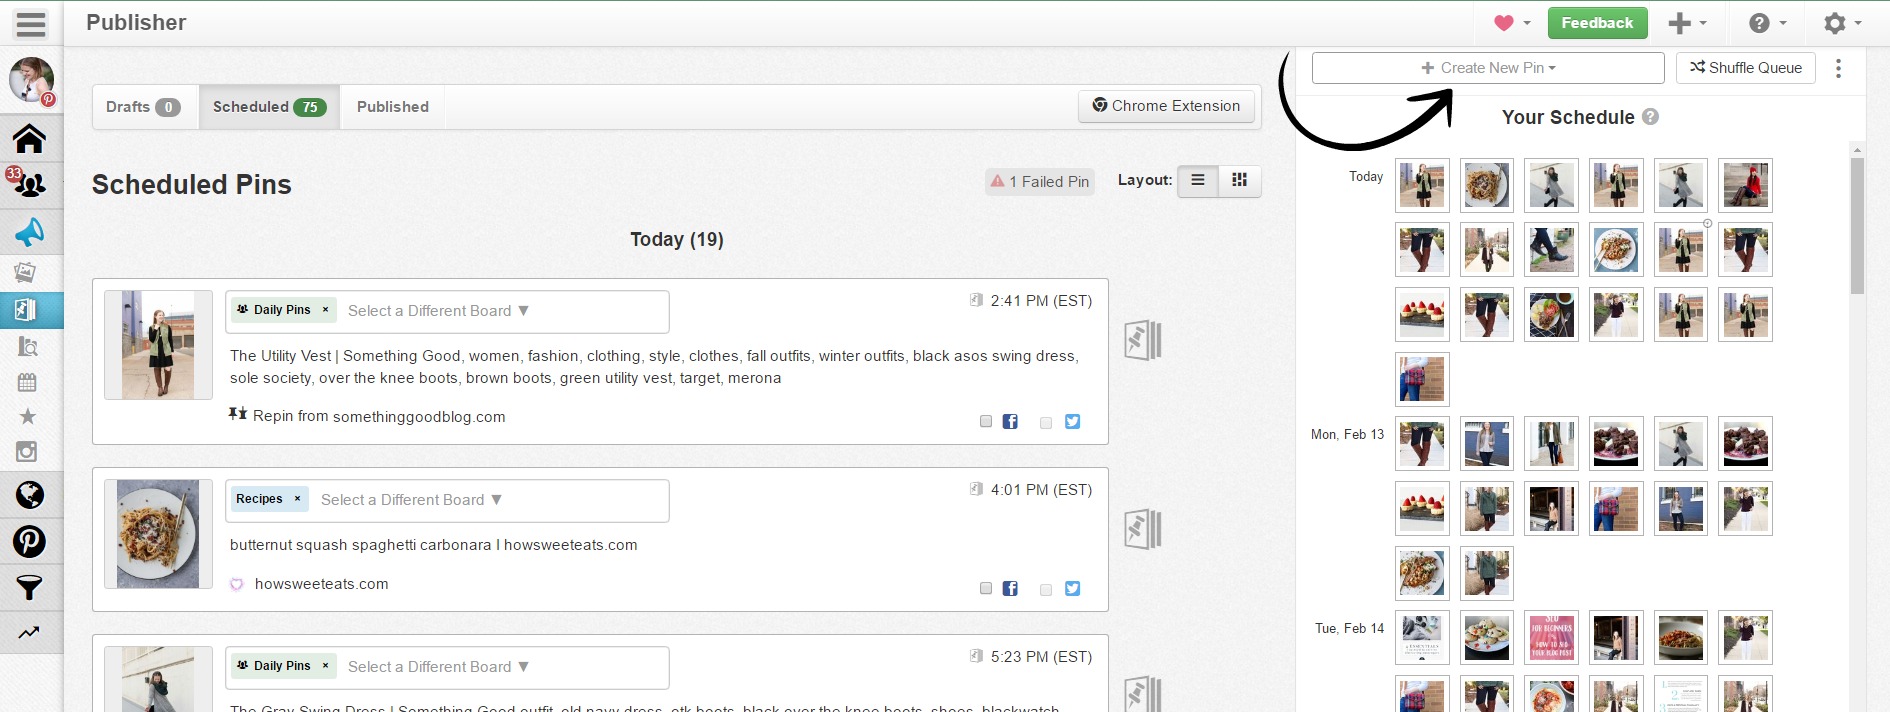
Go back to that left hand panel and under “Publish” click on “Schedule Pins.” From here, there are a number of ways you can post pins. First you can click the “+Create New Pin” button. That gives you the choice to upload an image, design a pin, pin from Instagram, or use the Chrome Extension.
Uploading Images is the easiest because you just pick a picture from your computer, upload it, assign the link, pick a board, and wham you’re done.
Personally, I prefer to use the chrome extension tool.
After using it once or twice, you will too. So first, install that chrome extension tool! Then head over to your website (or whatever website you want to pin from) and click on the extension button.

The tailwind extension will then pop up. Select whatever images you want and click the “Go Schedule” button at the bottom!
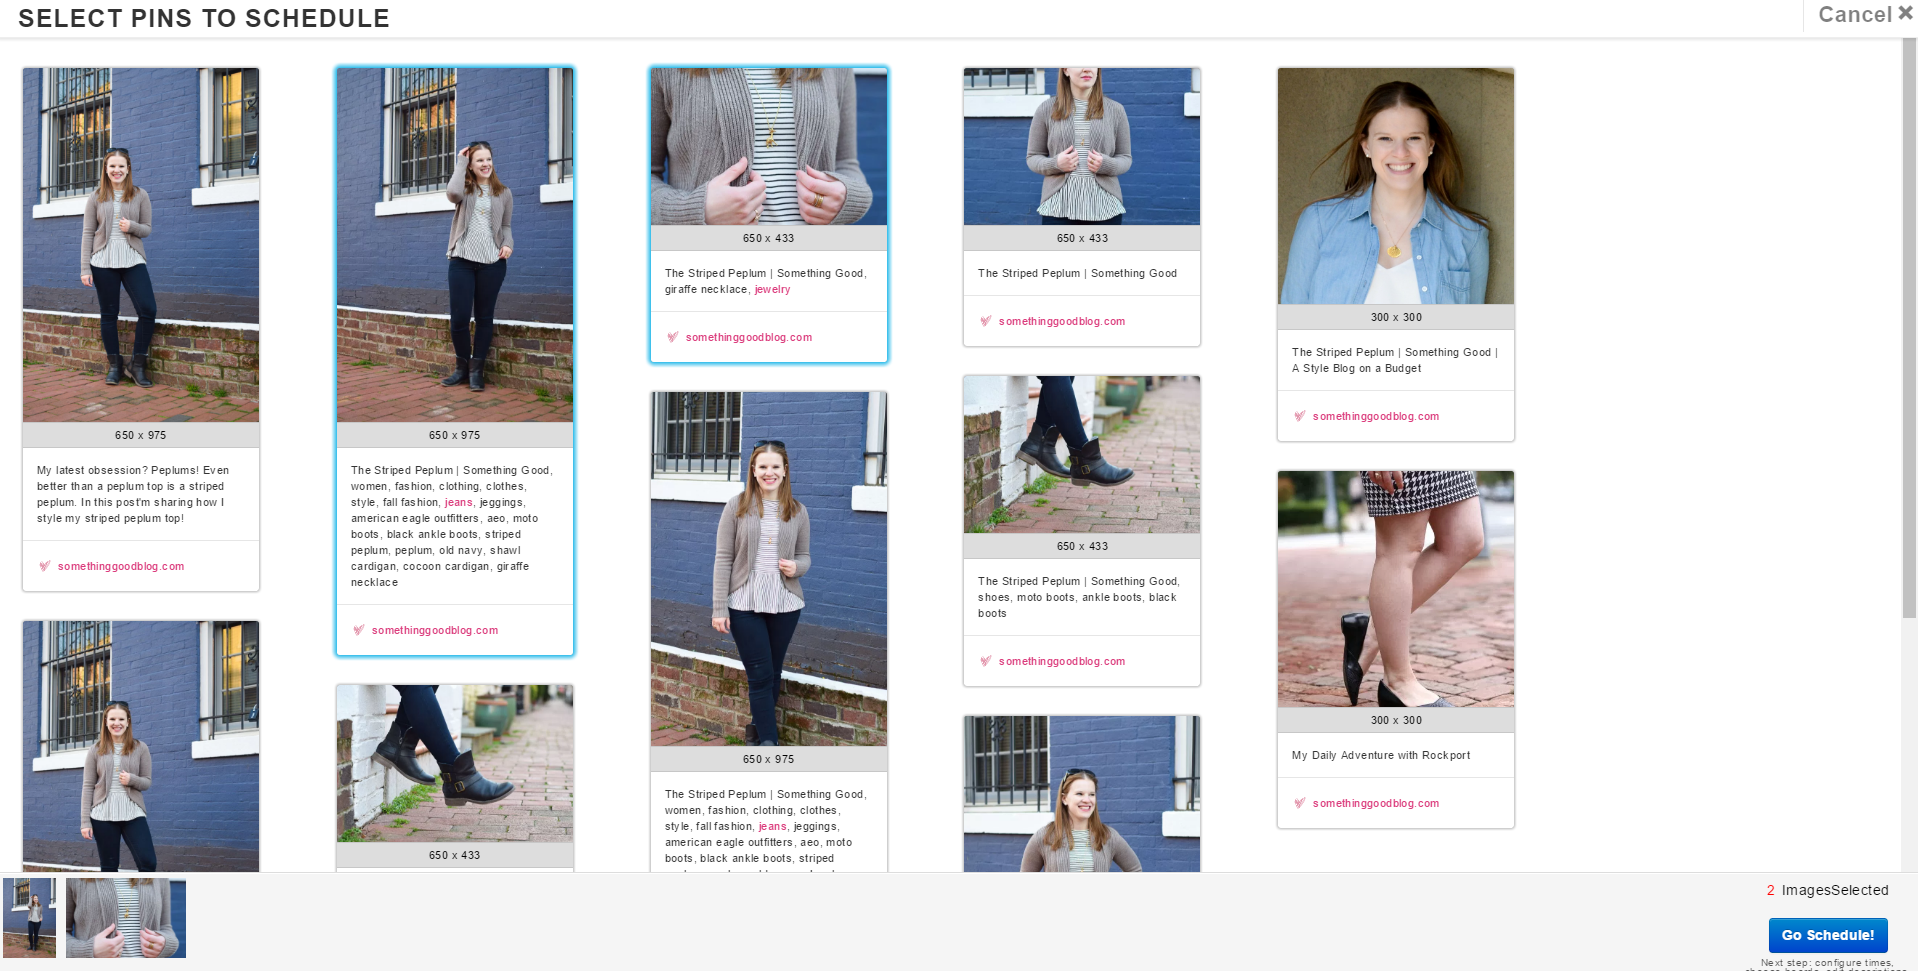
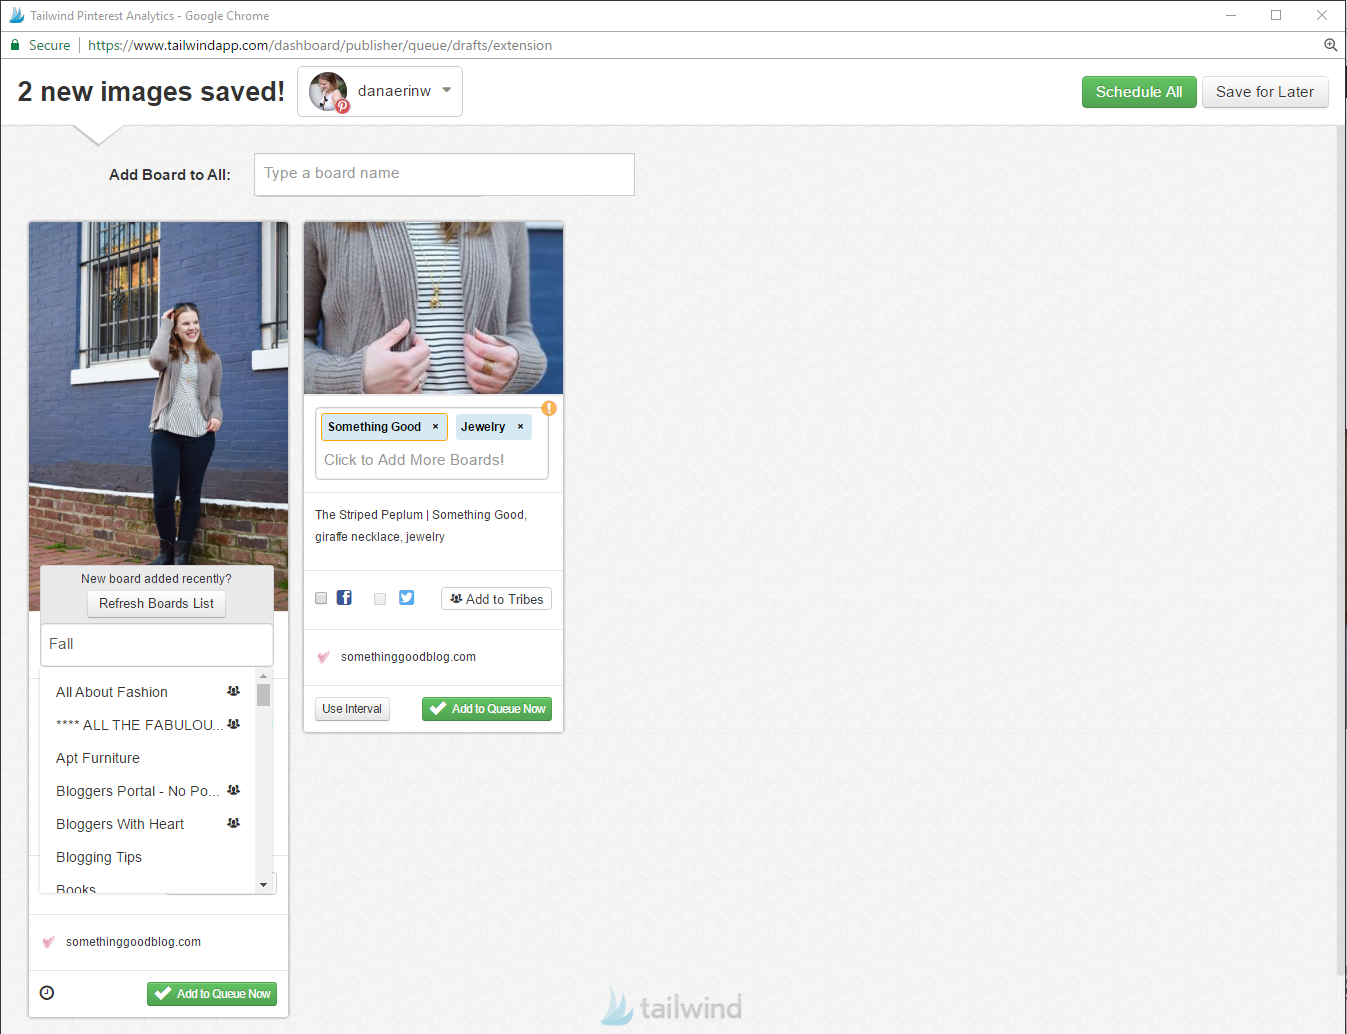
A window will pop up with your selected pins. From there, you’ll type in the boards you want to add the pins to and add in any text. If you’ve been pinning for a while, you know that that additional text is critical! That text is how people can find your pins when they’re searching. As you can see, I include a number of keywords in there to help make my pins search able.
You can also add your pins to multiple boards at once. This is really helpful because you can share one image to all of your group boards and your personal boards.
If you’ve already shared a pin to a certain board, you’ll get a little yellow exclamation point as a notification. This will help stop duplicate pins. Once you’ve added all the boards and spruced up the text, just hit “Schedule All” and you’ll be set!
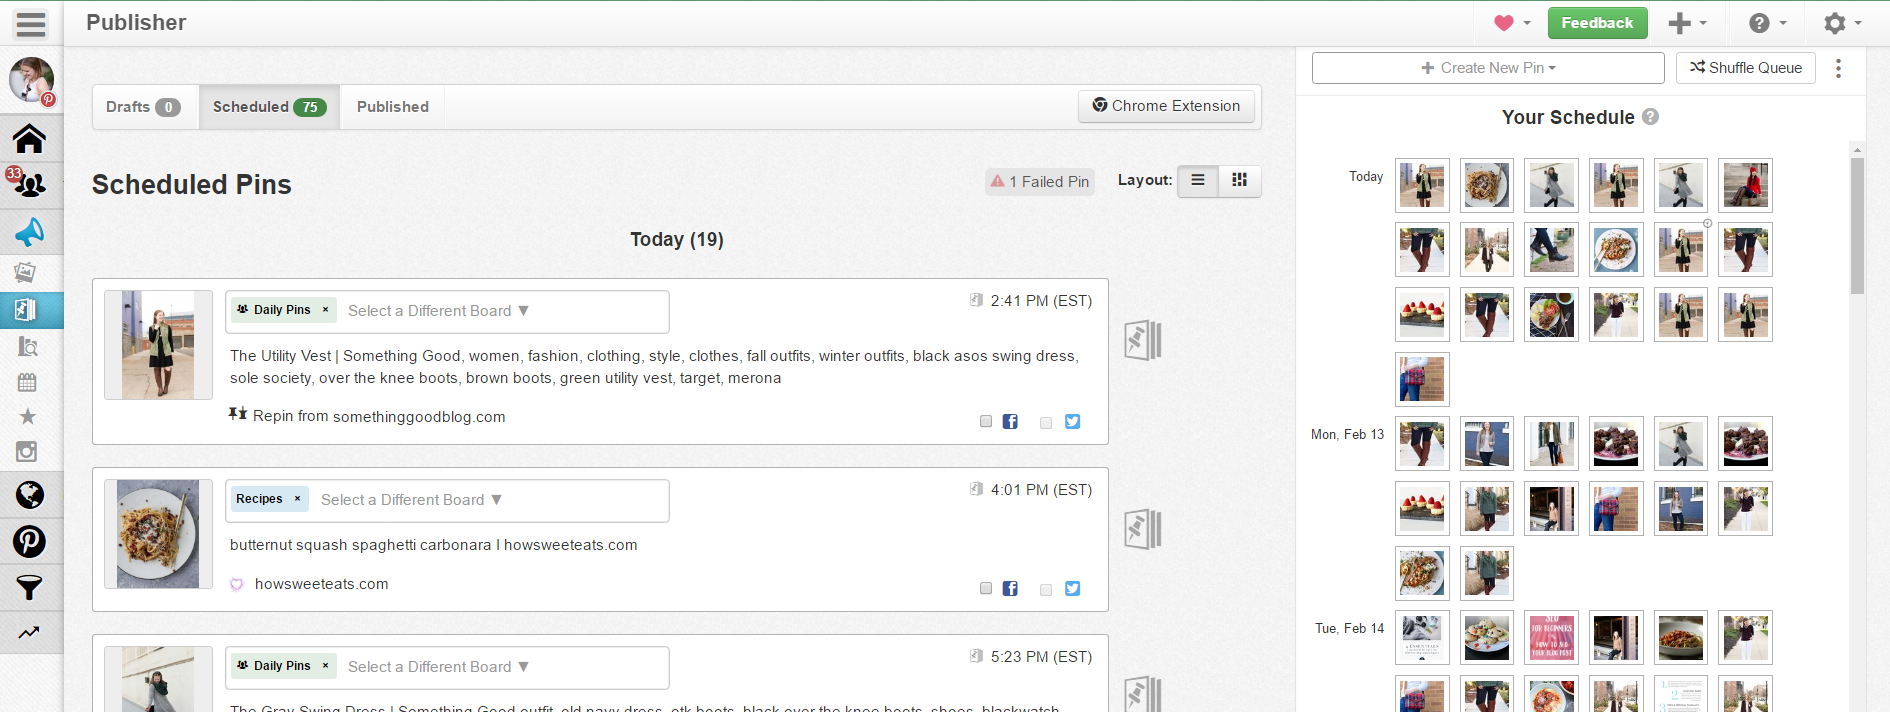
When you head back to your scheduled pins area, you’ll see those pins in the next available time slot.
If you need to move any pins around, you can either drag them to a new place in the schedule or hit the shuffle button to mix up all of your pins. I like to do this to make sure there’s variety in the order things are going up.
If you want to post from your instagram account, you can either do that from the “Create a New Pin” button or in the left hand panel, Select “Pin From Instagram.” This tool is in beta, but it’s great for posting content that you might not be able to share otherwise!
3. Optimize Content With the Pin Inspector
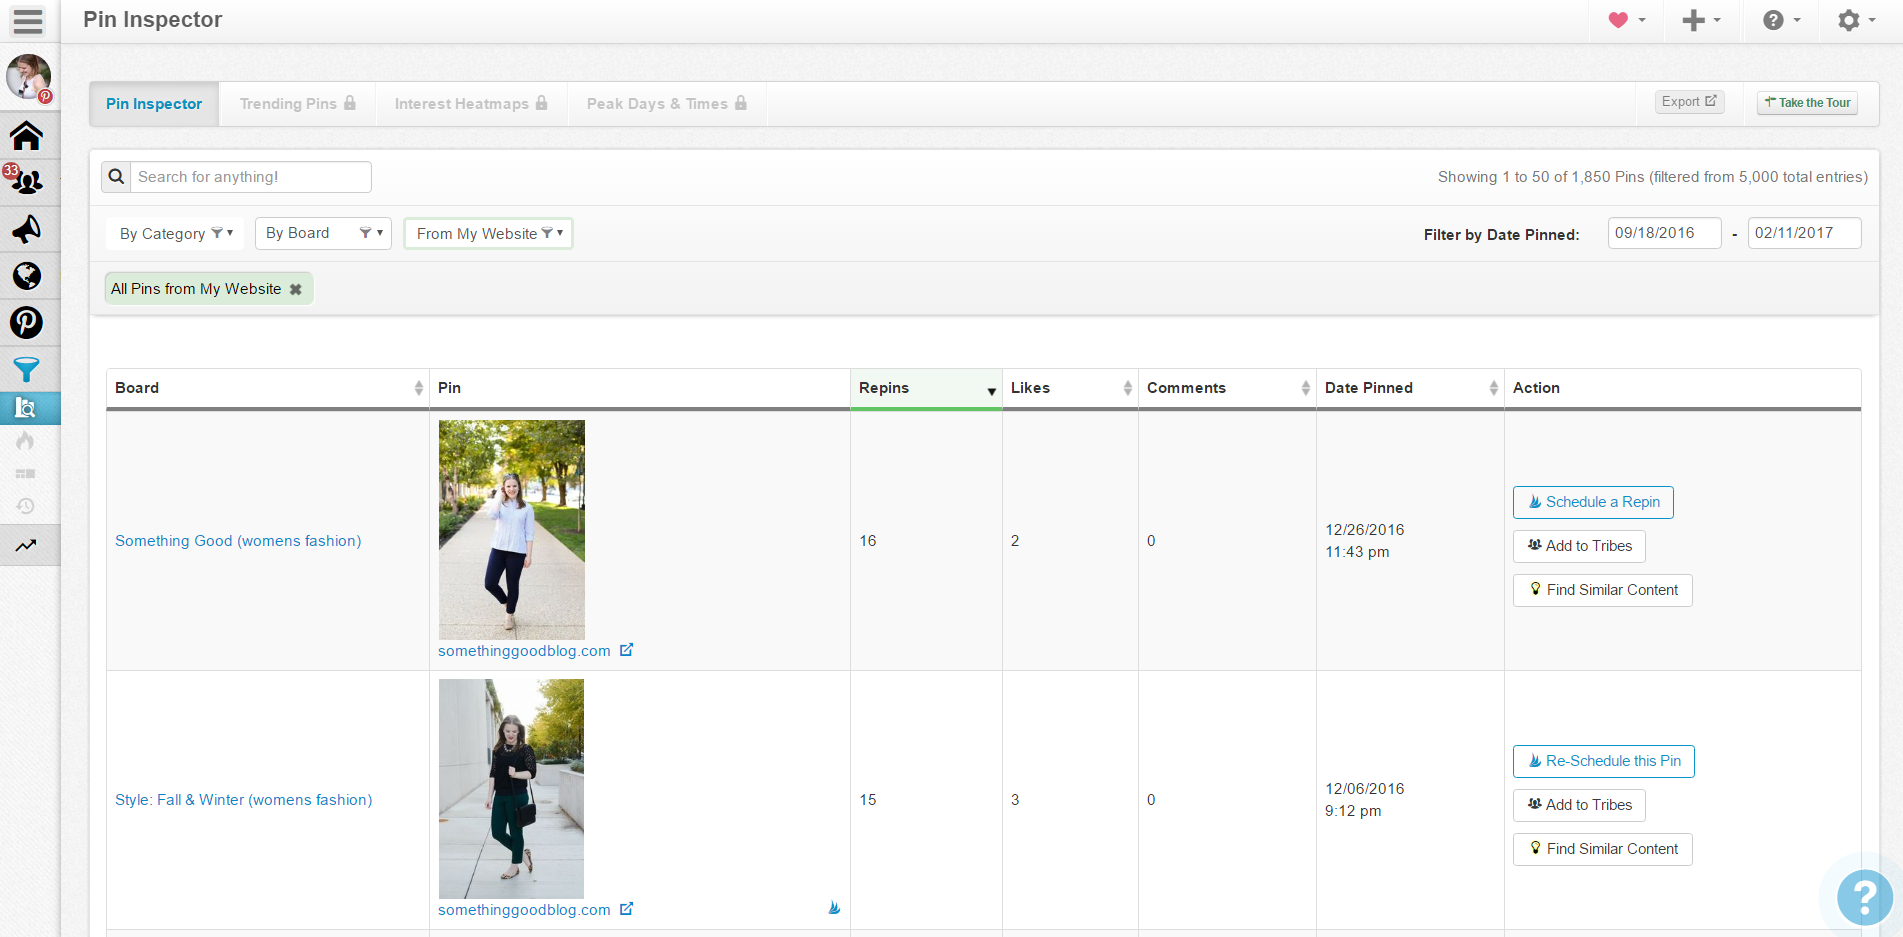
Now that you’ve been pinning for a while, it’s time to see how your pins are doing! Head back to the left hand panel and click on “Optimize Content” and then “Pin Inspector.” I’ll change the settings so I’m just looking at pins from Something Good (use the drop down at the top and select “From My Website”). From there I can see what pins are doing well in terms of repins, likes, and comments. if I see that a pin on one board is doing really well, I’ll then click the “Schedule a Repin” and repin it to that same board and to other boards with similar themes.
I would highly suggest playing with the filters so you can look at different content and how it’s doing.
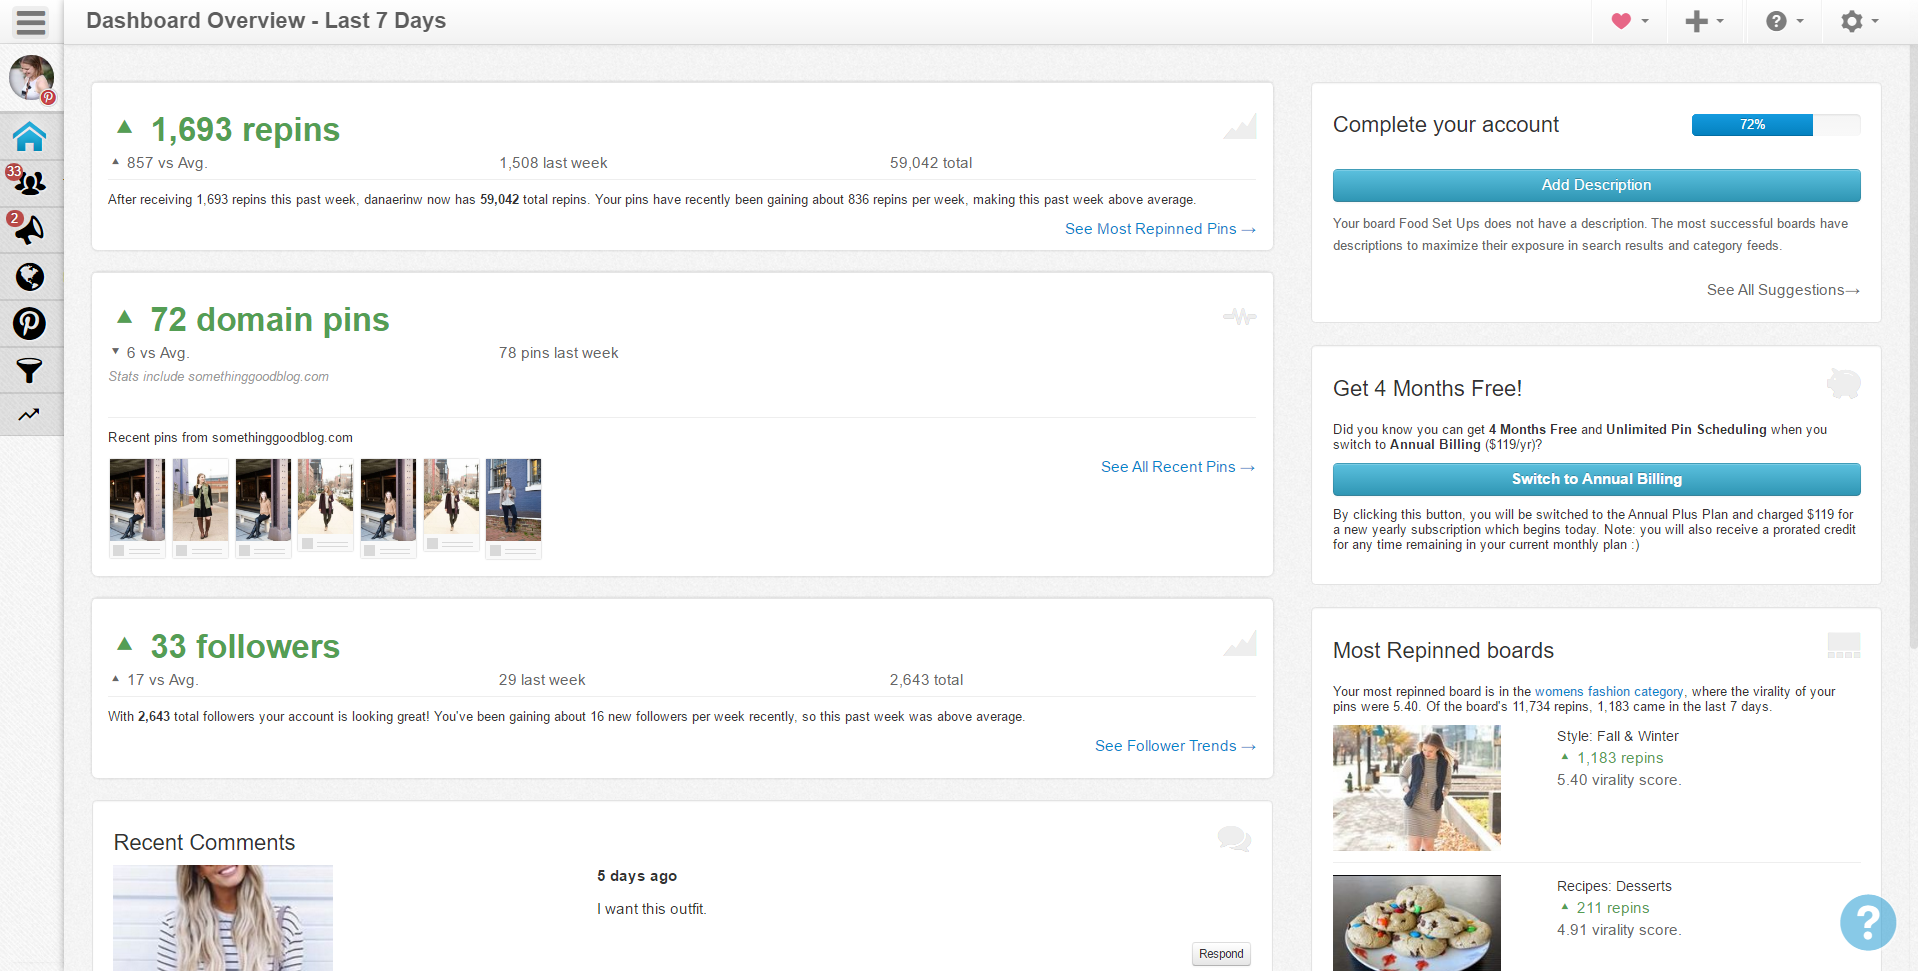
4. Insights
Tailwind also does a fantastic job of giving you insights into both how your brand is doing on Pinterest and how your Pinterest account is doing. They give you some really great free information under “Monitor Your Domain” and “Track Your Brand Page”, but a number of these insights are for the Enterprise. But, the information they make available to the lower level accounts is still incredibly useful.
Phew! That was a lot and I hope it was helpful! Honestly, I could have added about 7 more steps and gone into even more depth about all of the things that Tailwind can do (they’ve added instagram scheduling also), but I think I may save that for another post. For now, take the time to play around in Tailwind and watch how your account can grow!


I love the idea of pinning your different images all at once. That had never occurred to me! I’m still learned tailwind and can’t wait to see how powerful it really is!
It hadn’t to me either until I started using tailwind!
Let me know if you have any tailwind questions or want more tutorials! I’m already thinking of more that I could do!
This post is a godsend. Thank you for taking the time to teach us! I love it and now understand how to use Tailwind!
I’m so glad that it was helpful! Let me know if you have any questions!
Thank you so much for these tips, Tailwind has been so confusing to get the hang of!
Xoxo,
Ashley || Sed Bona
You’re welcome! Please let me know if you have any Tailwind questions!