Note: Today’s post contains affiliate links, which means I may make a commission at no cost to you when you purchase from my affiliate links. Additionally, this post is done in partnership with Tailwind and I was compensated for this post. Thank you for supporting the brands that support Something Good.
A second note: This is more of a post for bloggers and people working in social media, so if you have no need for prescheduling your social media posts, skip over this one. We’ll be back to our regularly scheduled content soon.
It’s time for another Tailwind tutorial! I haven’t done a Tailwind tutorial in a quick minute, so if you need a refresher, I would suggest check out my past tutorials here. Since we’re focusing more on Tailwind for Pinterest today, my first and second tutorials will be the most helpful if you need a refresher.
But, if you haven’t used Tailwind at all before, make sure to sign up first! It’s an amazing tool that will completely change your Pinterest and business life.
How to use Tailwind Create to Create the Perfect Pins
Okay, so now that we’re here, let’s first talk about why you would want to use Tailwind Create.
Why Would You Use Tailwind Create?
Luckily, that one is quite simple. Which pins are you more likely to click on when you’re browsing Pinterest? The dark images that you can barely make out? Or the bright and colorful images that have text that clearly let you know what that pin in linking to?
Don’t answer, that question was rhetorical.
The pins that do the best on Pinterest are the ones that are designed well. Pretty pins do better on Pinterest. It’s just that simple.
Unfortunately, not all of us are graphic designers who can make our pins look amazing. Luckily, Tailwind knows that, which is why they made Tailwind Create. Tailwind Create is going to give you all of the tools you need to make those beautiful, clickable graphics, and they’re going to make it easy to make.
So let’s get started with how to use Tailwind Create.
How to use Tailwind Create
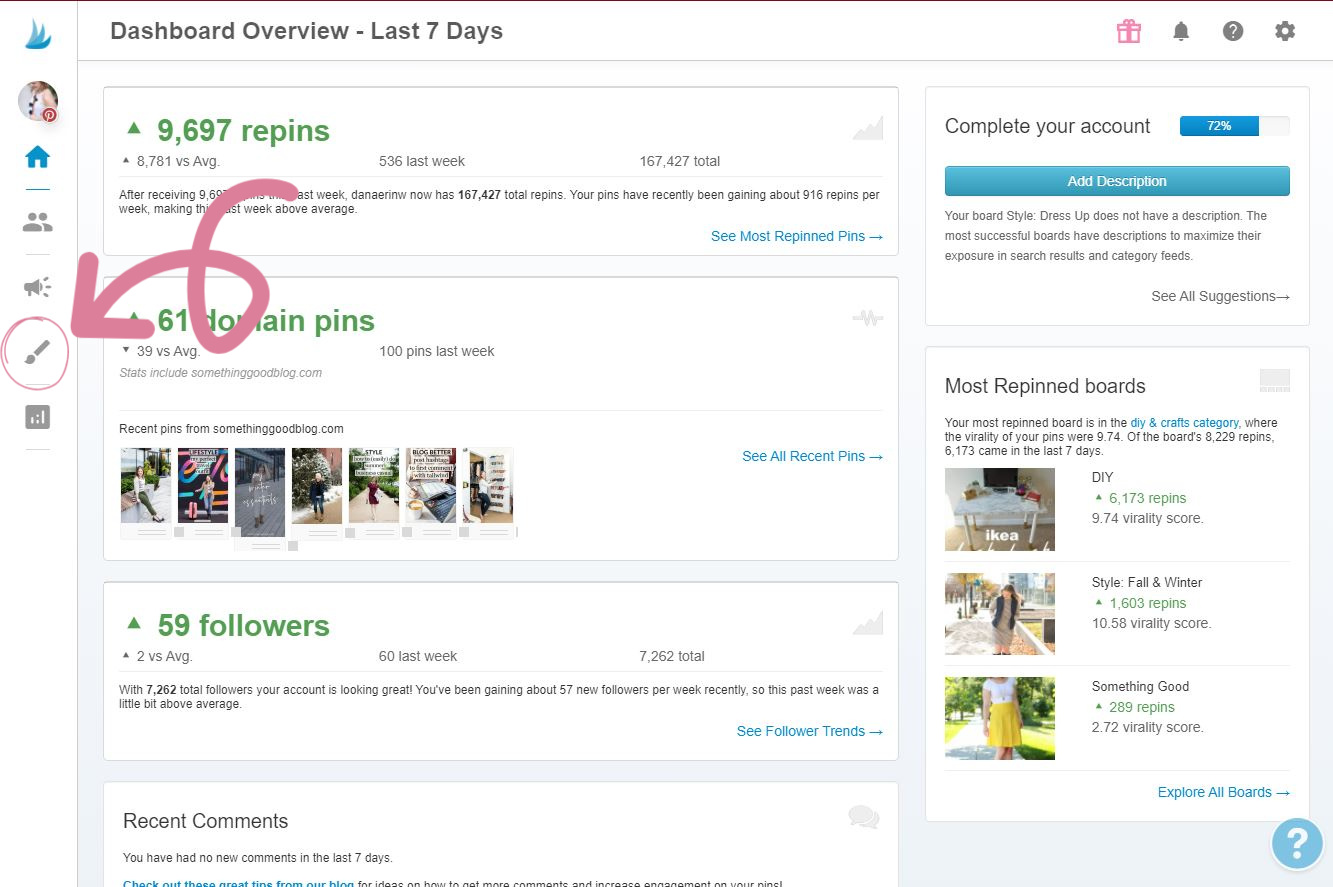
Navigate to Tailwind Create on your lefthand side bar.
The sidebar looks a little different now, doesn’t it? It got an update along with the addition of Tailwind Create! This button is now nestled in between Publisher and Insights
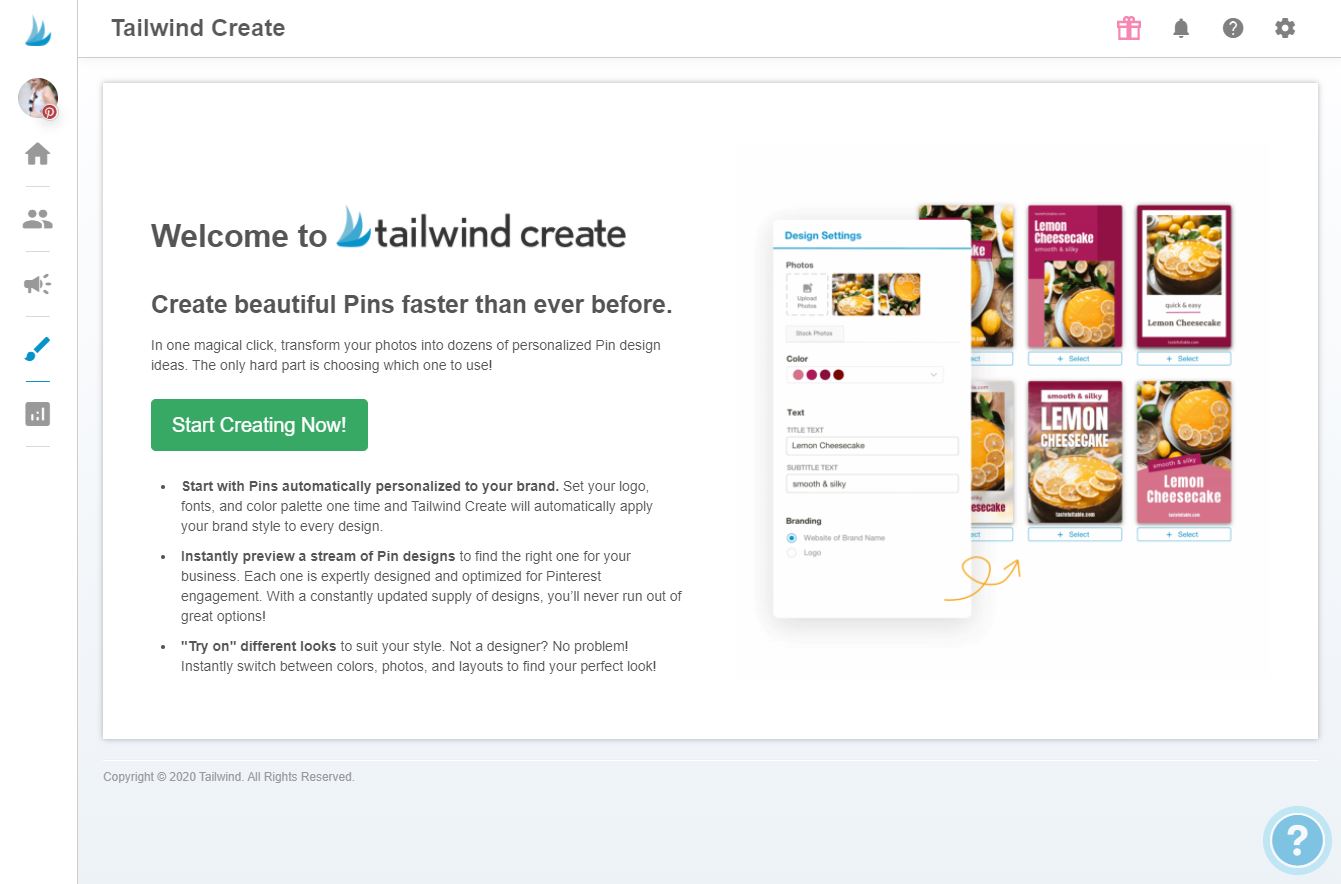
Since this is your first time there, you’ll also get this great welcome screen. Click on the big green button that says “Start Creating Now” to create your first pin!
(And yes, accept and agree to the Terms and Services.)
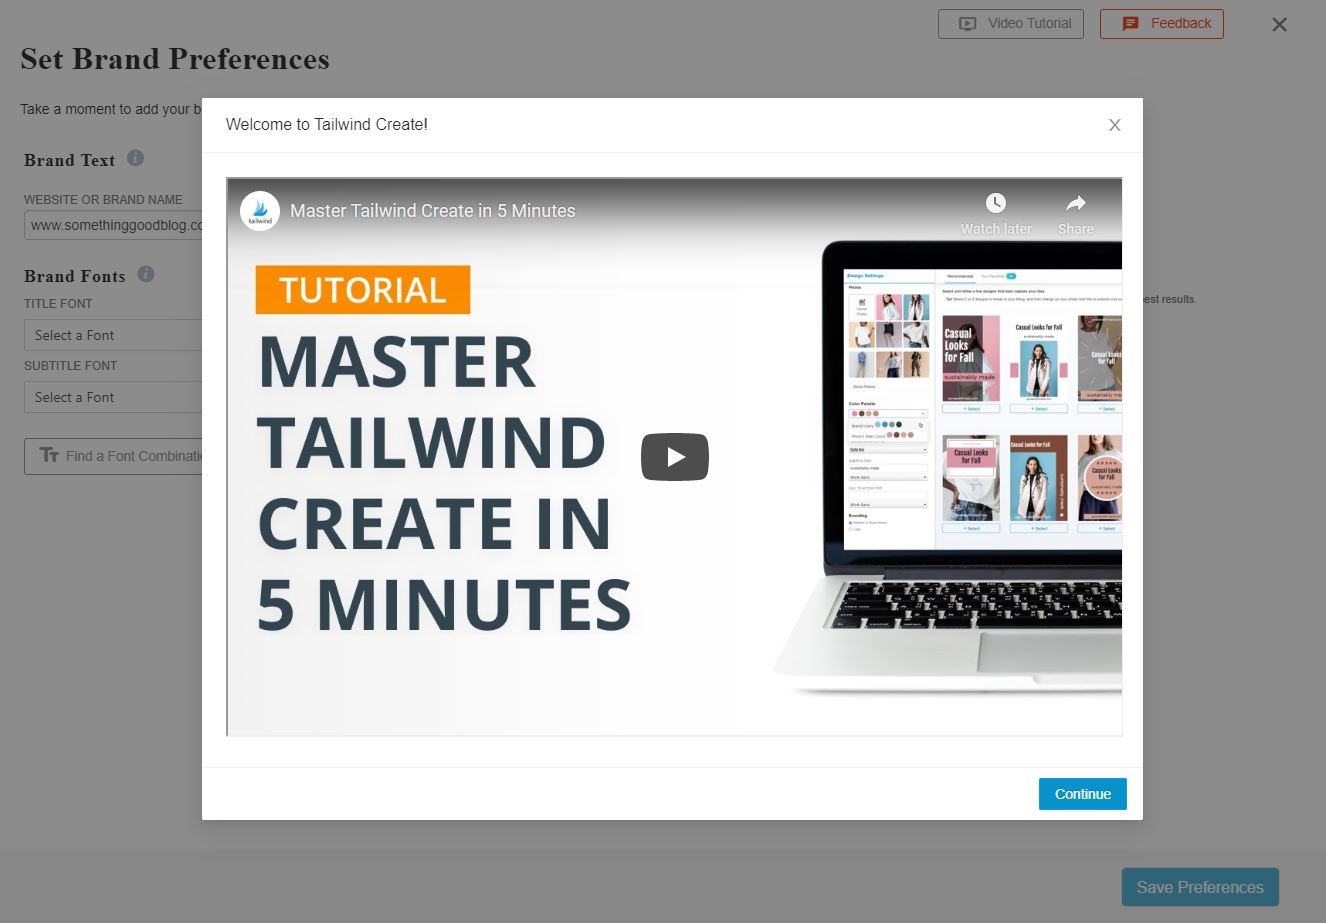
Watch the Tutorial Video
I’ve learned the hard way that if you don’t watch the tutorial video the first time, you’ll just end up going back and watching it later. So let’s all just do ourselves a favor and watch it together this first time.
Set Brand Preferences
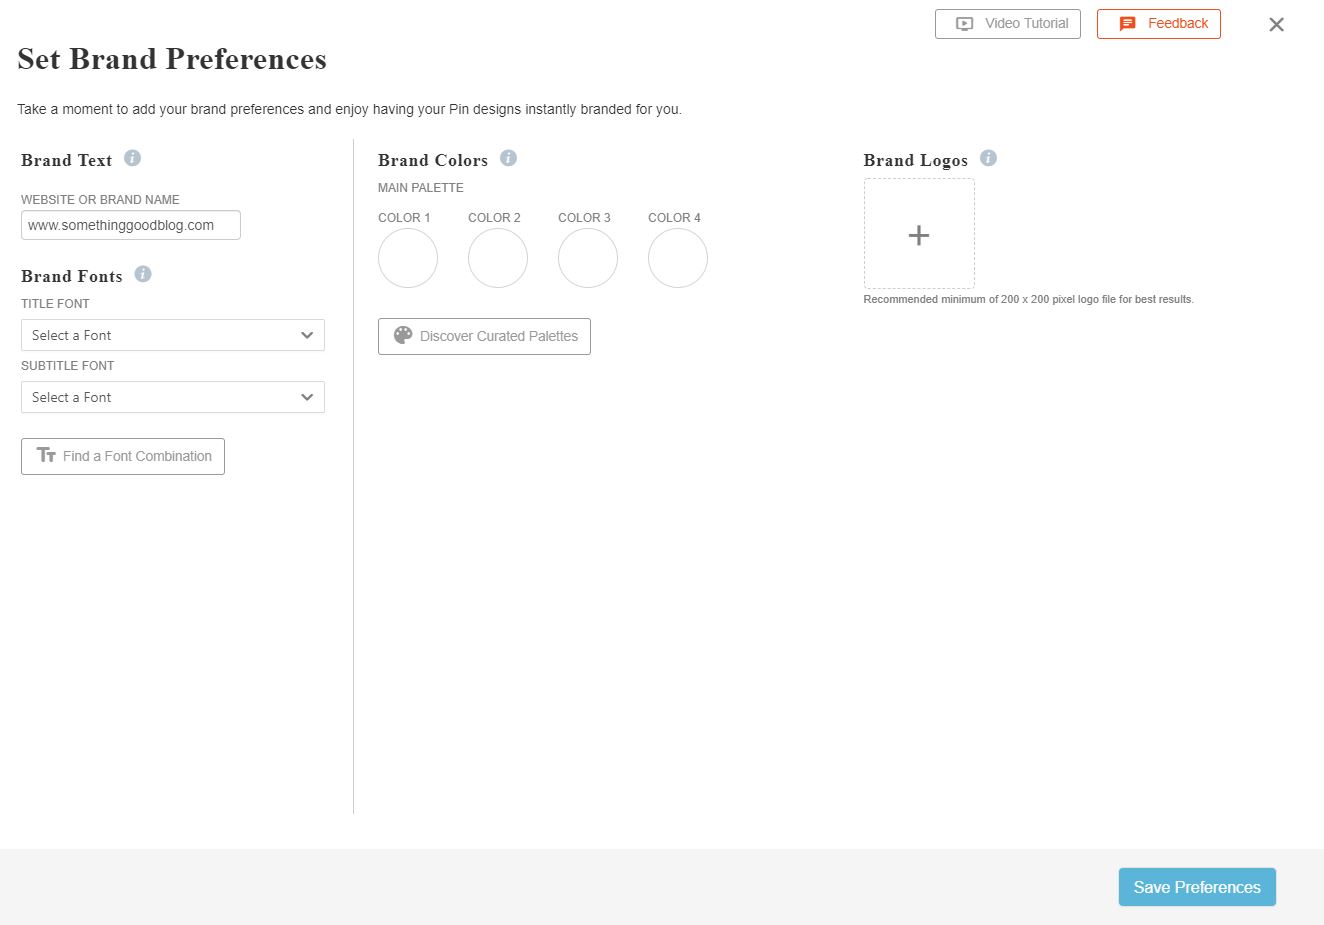
Now this is the part that I really love. Before you do anything else, you can pre-program all of your brand colors and logos. That way they’ll be ready for your pins every time. You don’t necessarily have to use them or fill out everything, but they’re there just in case you need them.
Upload Basic Pin Info
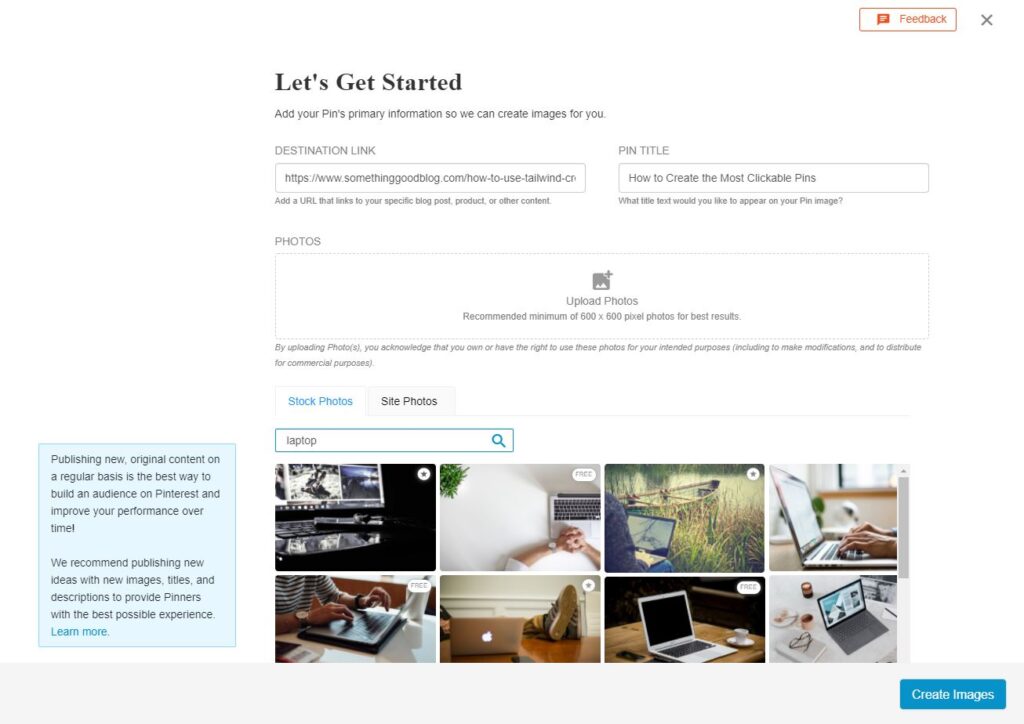
Now you get to upload all of the basic information for your pin! What post do you want it to link back to, do you have photos to upload, and what is the title for it?
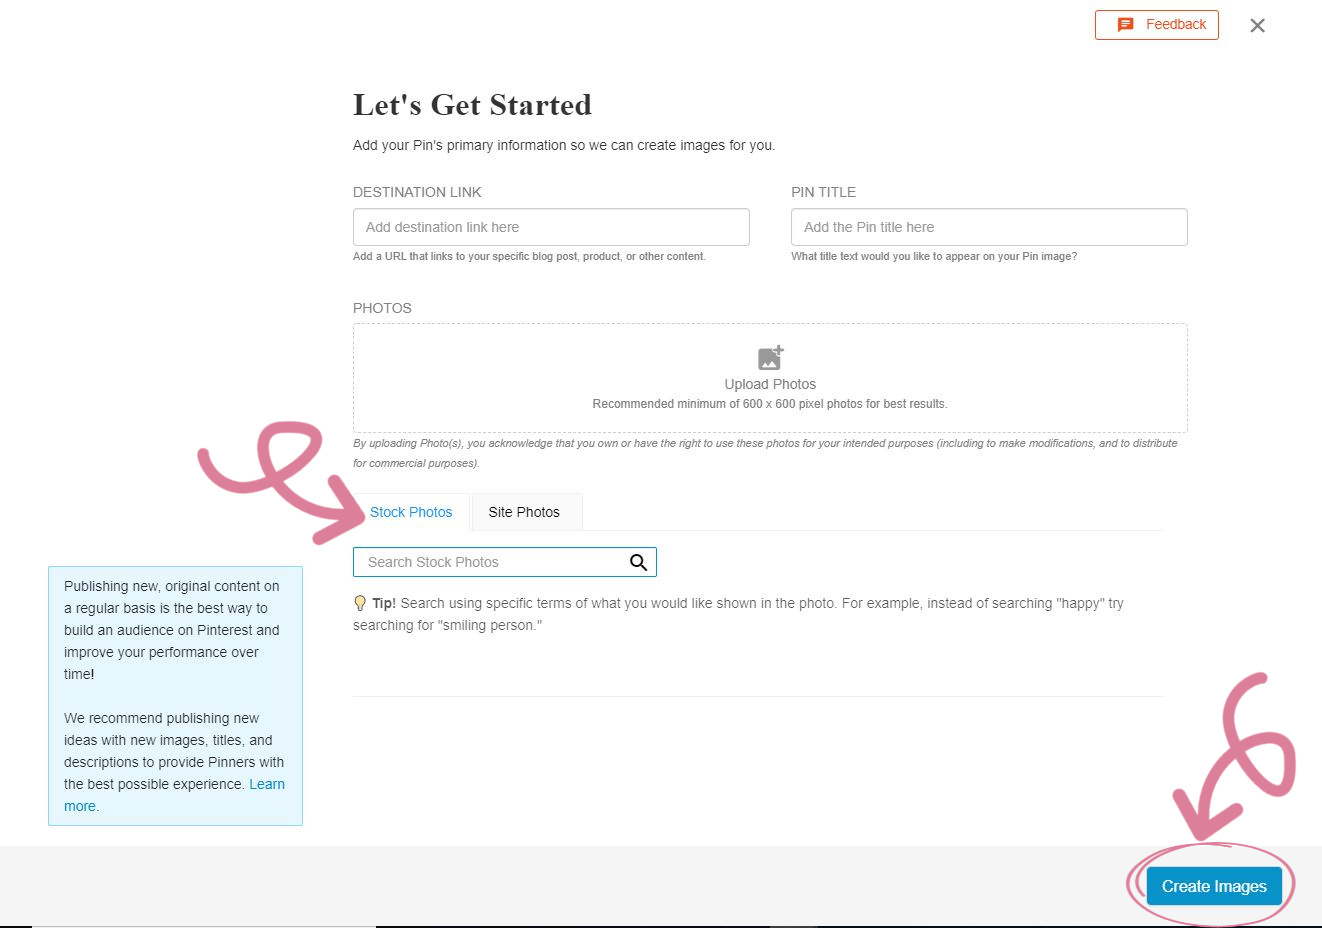
Once you’ve entered all of that information, then click create!
Design Your Pin
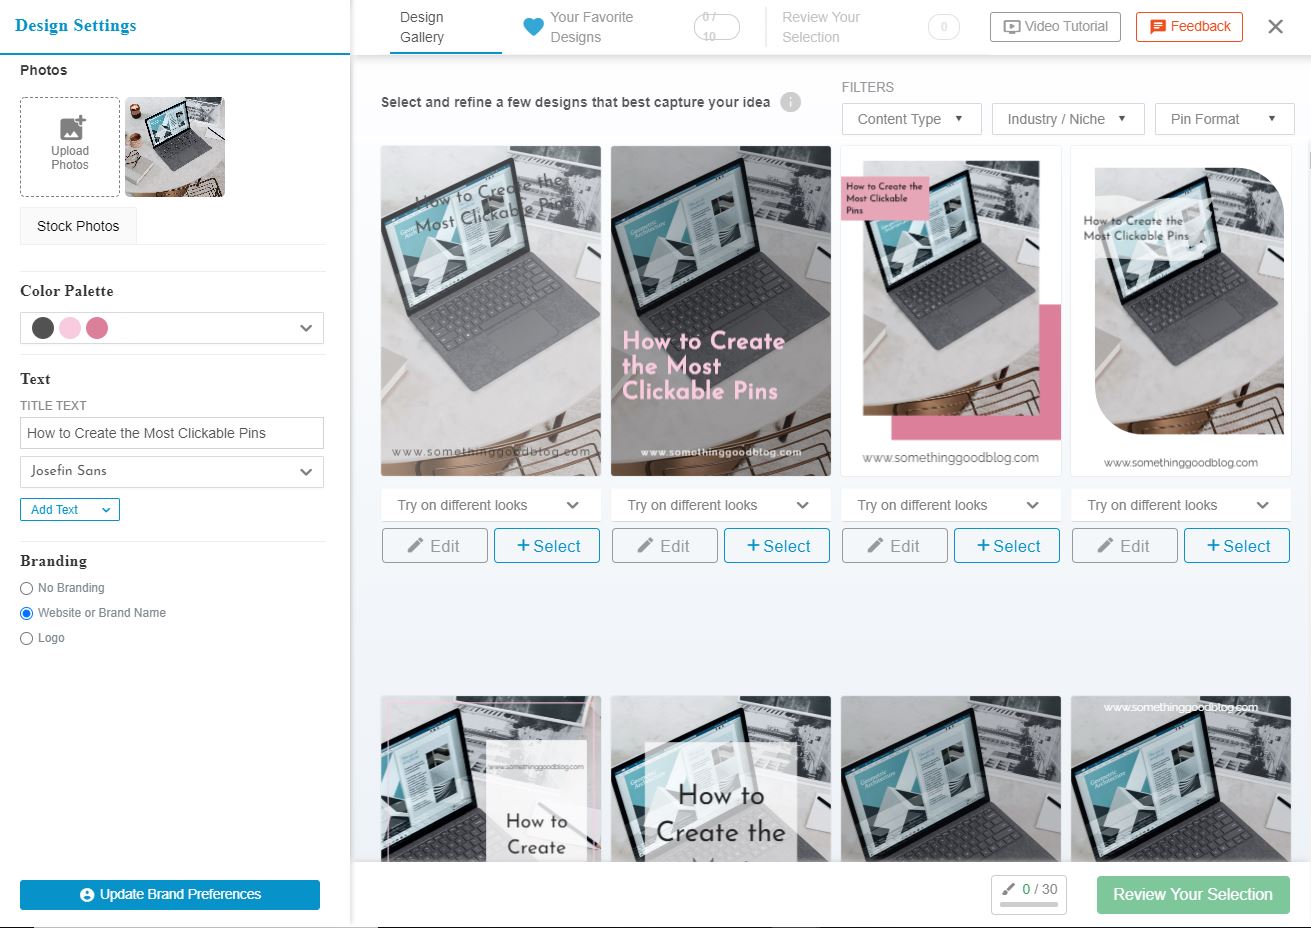
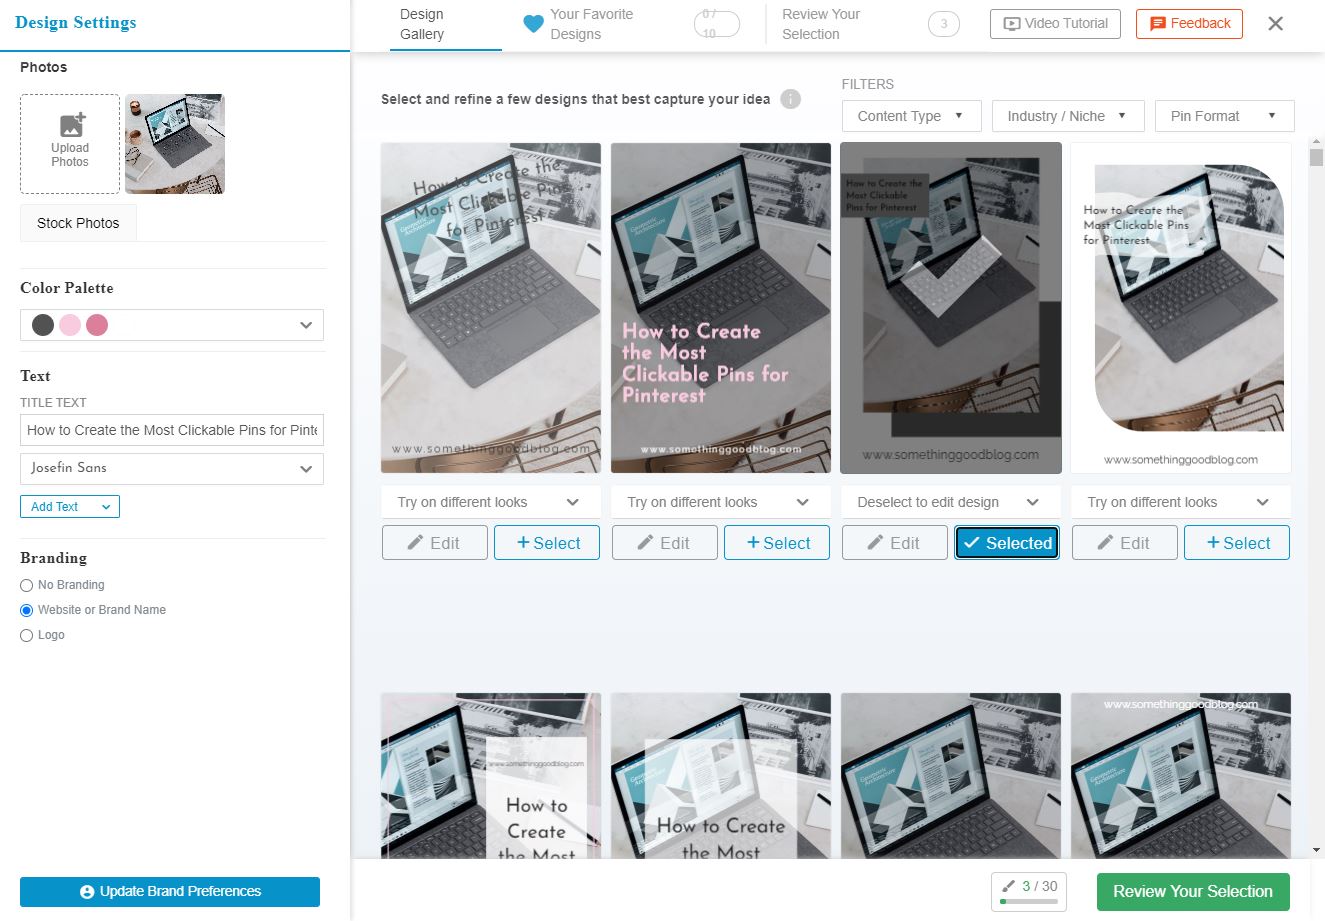
Now is the fun part, you get to become a graphic designer! Tailwind Create has a number of pre-created templates and you’ll be able to browse through them and play with each design until you find the one that’s perfect for your pin.
Tips
- Create multiple pins with various designs to pin, 3 to 5 would be your best bet
- Go with different colors and don’t be afraid to mix up your branding styles
- Save your favorite designs so you can come back to them in the future. This is also an incredibly good practice to continue, because you want to have continuity in your pins and their design. It’ll make your pins more recognizable in the future to people browsing Pinterest and make your pins more likely to be clicked on.
- Use the “Try On Different Looks” feature. If you don’t like one of their styles, CHANGE IT
- Give your pins different titles. Each pin is more likely to have increased repins if they all have slightly different titles. More repins= more potential views.
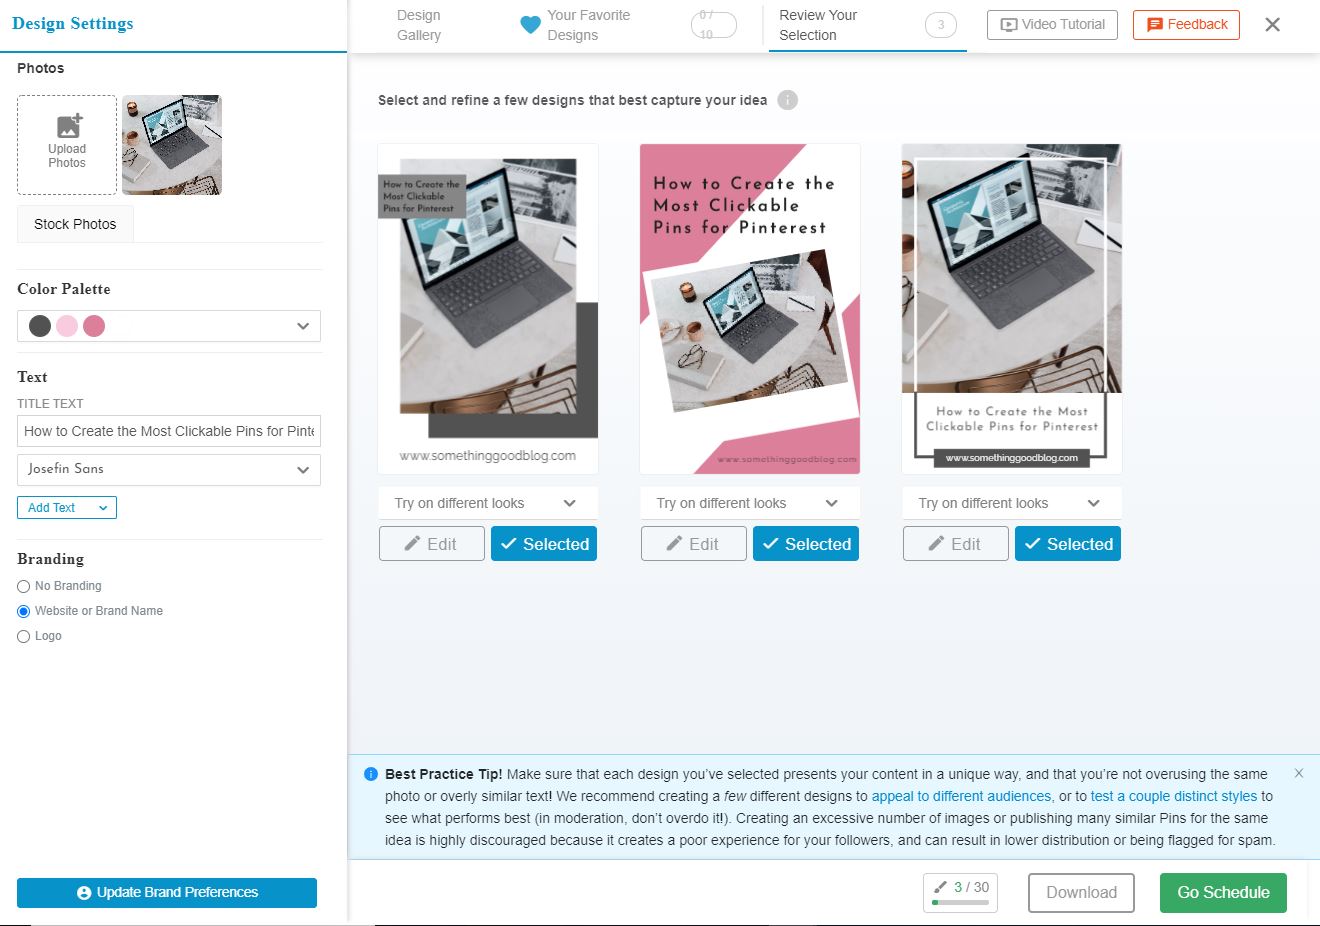
Review Your Selection
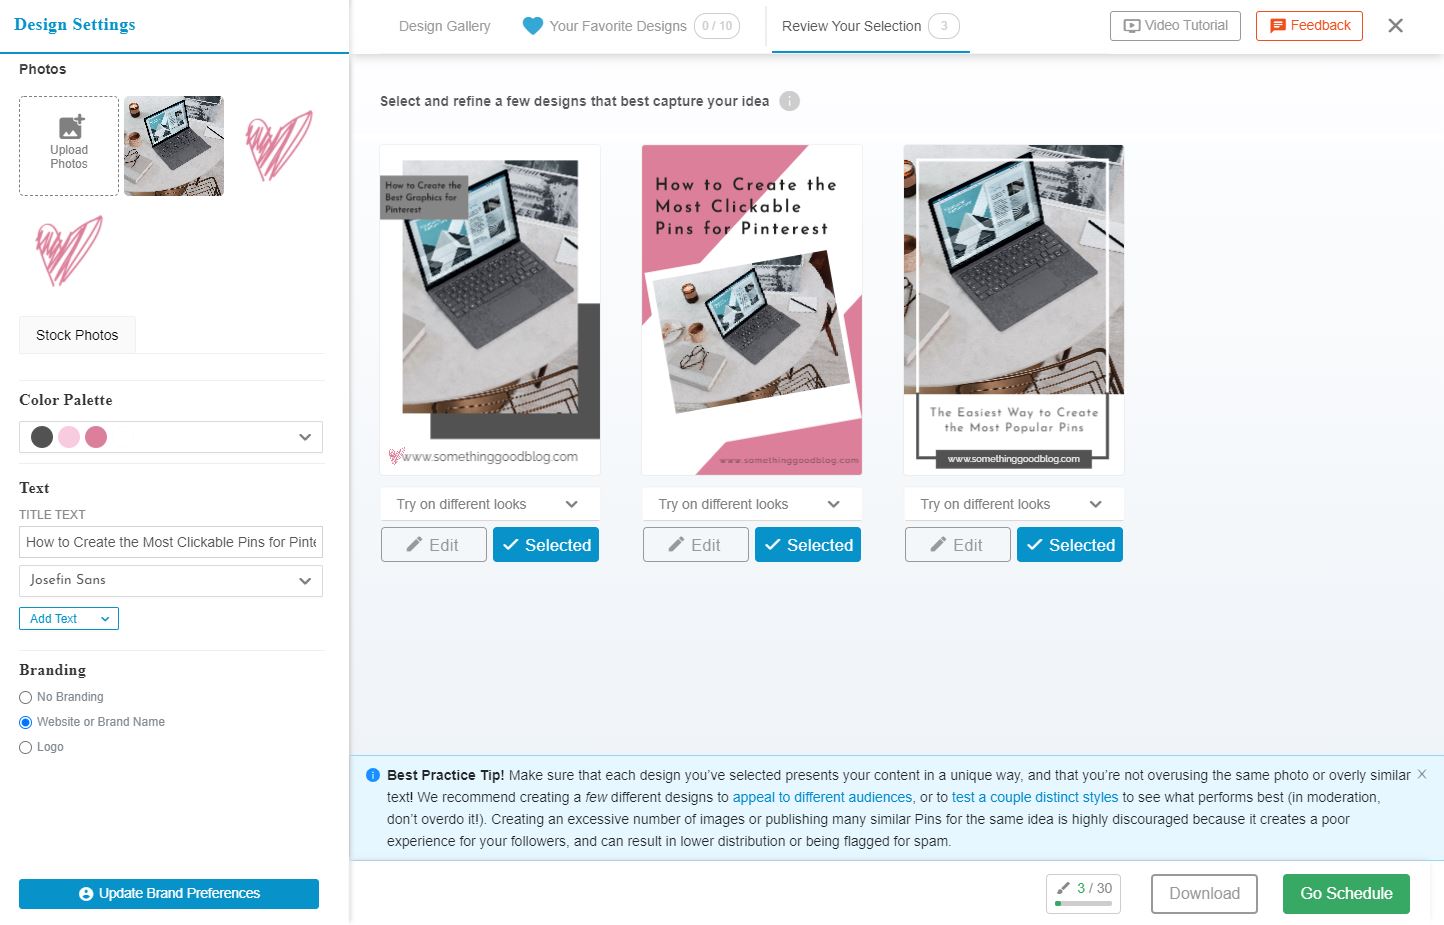
Use this point to check out the pins you want to most and make sure that they’re all different. By this I mean that they should all have different styles, colors, and slightly different text.
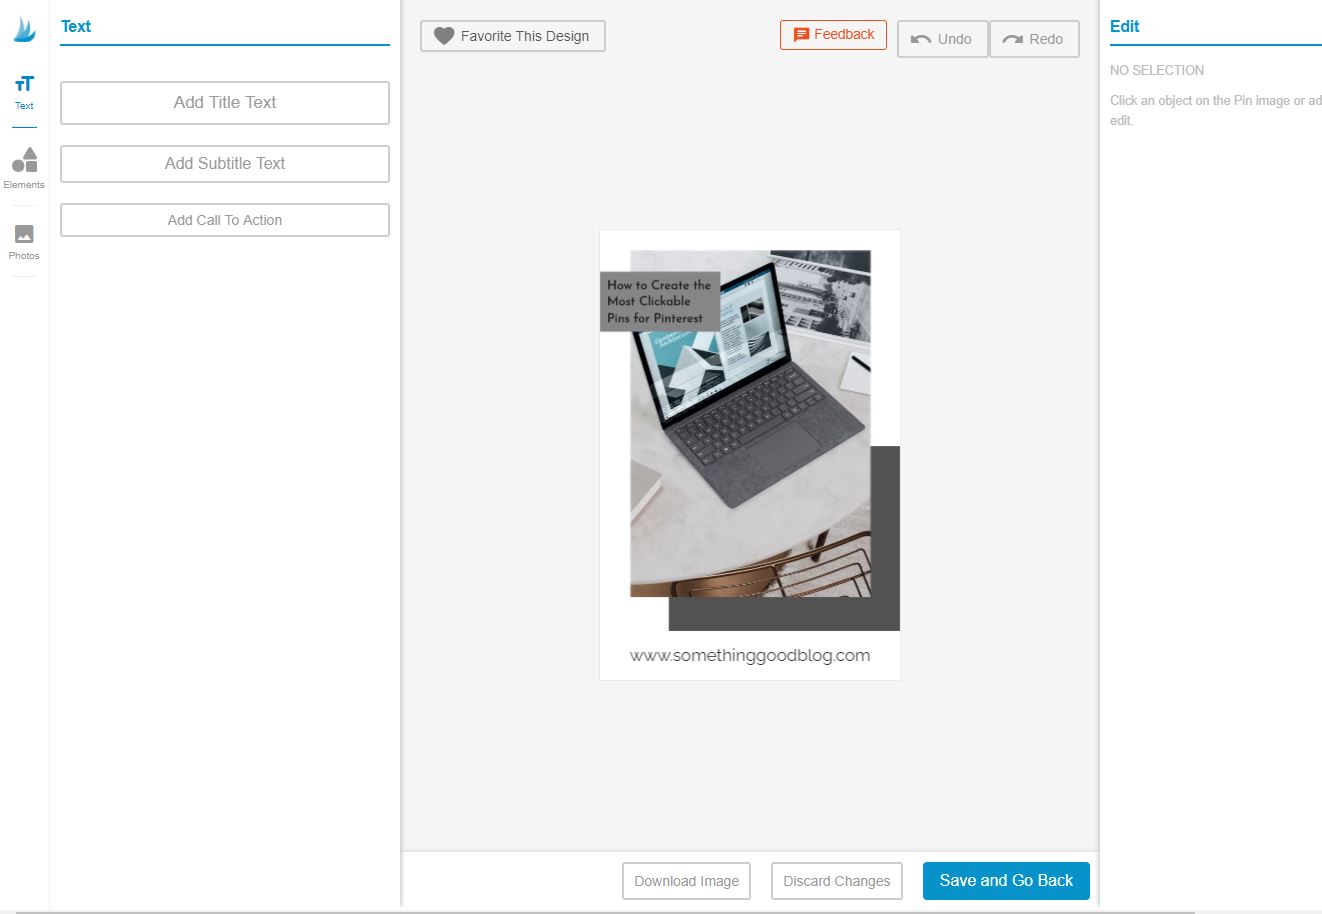
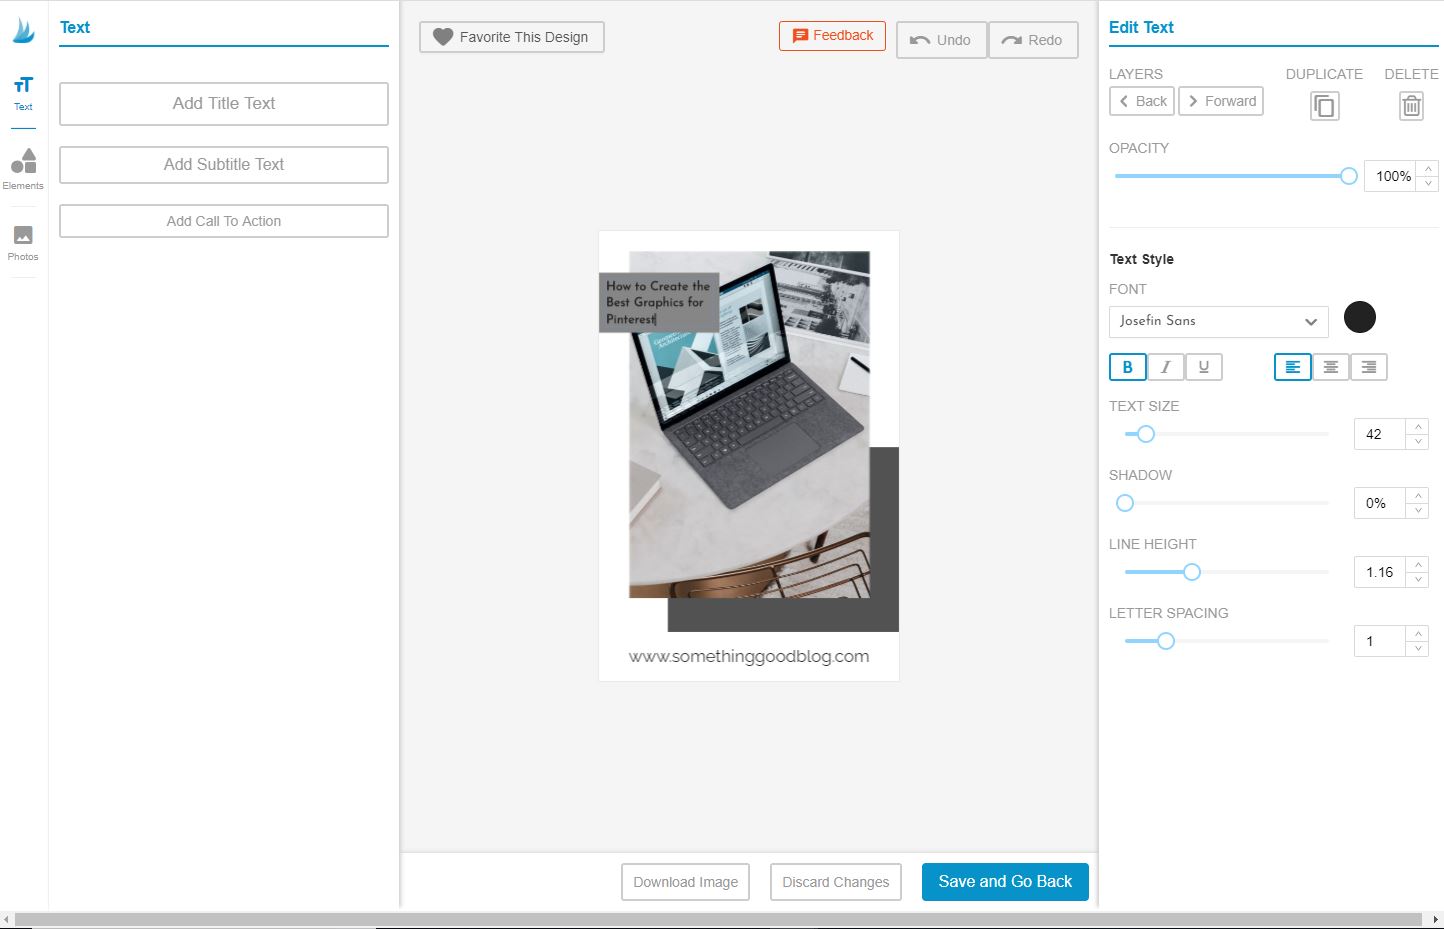
If you realize they’re all the same, you can click on the edit button by each pin to go in and edit the text. You can also go in and add subtitle text or even the picture.
Once you’re satisfied with how they look, hit the green, “Go Schedule” button!
Schedule Your Pins
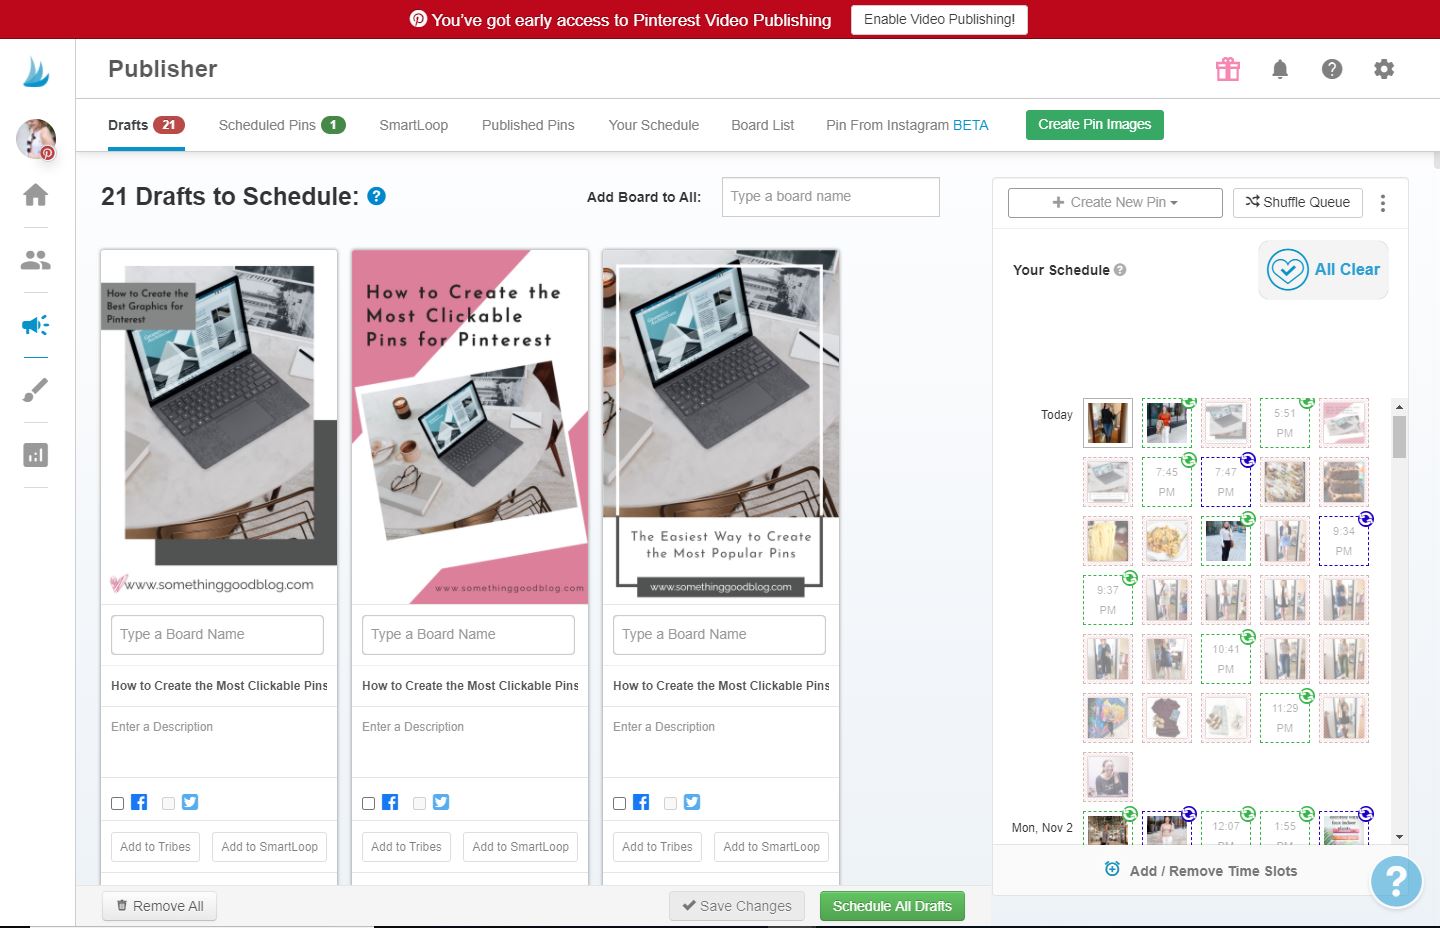
Your pins will then go into your drafts folder where you can schedule them once you’re ready. You can use my post from part 1 if you need a quick refresher on scheduling from your drafts folder and some best practices.
Would you rather watch?
For those of you who would prefer a more interactive version, I’ve created a quick video here to show you how to use Tailwind Create!
Now, here’s what you need to know about signing up for Tailwind and getting Tailwind Creates.
- If you’ve never done Tailwind before, you can start it with a free trial. If you haven’t tried out Tailwind, this trial is NOT TO BE MISSED! As part of your free trial, you’ll get to post 100 FREE Pinterest Pins! Trust me, that’s a lot of pins and a GREAT deal!
- After you’ve used your 100 free pins, you can sign up for annual plan of $119.88 (9.99/month) or $14.99 monthly. (If you click on my link , I do receive money from my referral)
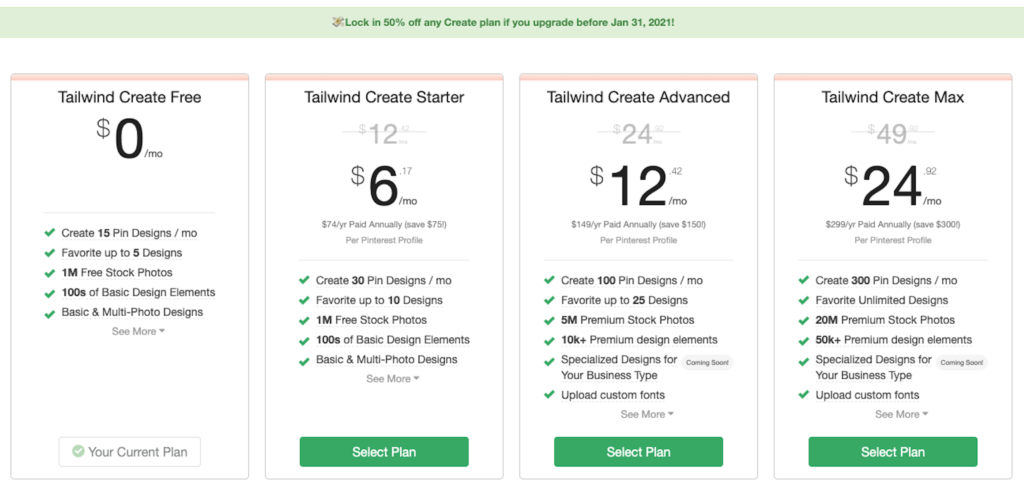
- Tailwind Create is a separate add on, but there is a free option AND you can get 50% off until January 31, 2021 (these prices are also subject to change after the public launch). Here are the pricing options:
Let me know if you have any questions about Tailwind Creates or any other features of Tailwind!


Comments
Comments are closed